ngx-hatool
![]()
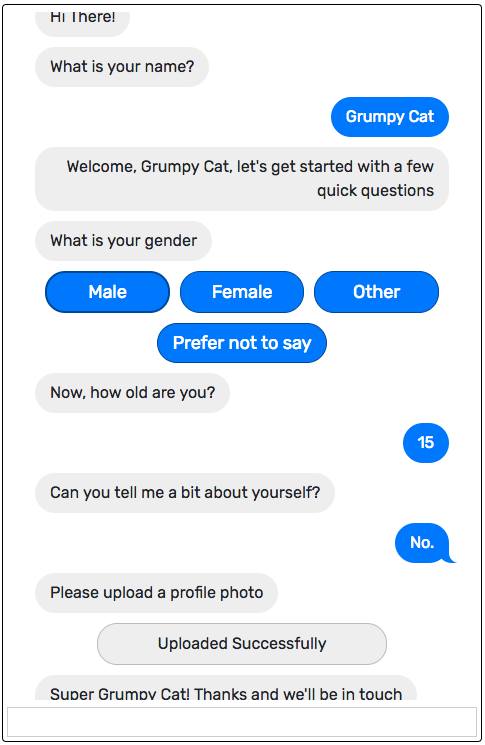
A themeable chat-like UI element for Angular 10+.
See demo
Quickstart
$ npm install --save ngx-hatool@latest
Then, in your app.module.ts, import the Hatool module:
import { HatoolLibModule } from 'ngx-hatool';

@NgModule({
  declarations: [
      // ...
  ],
  imports: [
    HatoolLibModule,
API
htl-hatool
This is the chatbot component.
Put it where you’d like the chat box to live, and pass it a ContentManager instance.
<htl-hatool [content]='content'></htl-hatool>
ContentManager
The content manager is the object that holds all the chat compoments (‘messages’) that are currently visible to the user, as well as a queue of yet-to-be-displayed messages.
You need to instantiate a content manager for every chat component that you’d like to show, like so
import { ContentManager } from 'ngx-hatool';

// ...

const contentManager: ContentManager = new ContentManager();
Normally you wouldn’t need to use the Content Manager’s API directly, although in some advanced cases you might want to do that. In any case, through the Content Manager you can add messages to the chat manually, and change the behaviour of the chat in various ways.
ScriptRunnerImpl
The script runner is responsible for reading the conversation ‘script’ and applying it to the content manager.
You instantiate a Script Runner object using three parameters - a core Angular HttpClient instance, a ContentManager instance and the current locale (as scripts have i18n support - more on that later).
const runner = new ScriptRunnerImpl(this.http, this.content, 'en');
Running a script is done using the runner’s run() method. This method returns an observable which fires when the script finished running.
runner.run(
    scriptUrl, scriptIndex,
    customFunctions,
    valueSetCallback,
    record
).subscribe(() => { console.log('done!'); });
record is one of the most important bits you need to pass the runner, as it serves as the context of the execution script. Commands refer to it, read from it and put values into it.
Other arguments are:
scriptUrlis the location of the script file that is to be executedscriptIndexis the index of the specific script to be run in the script file (each script file can contain multiple scripts, see later).customFunctionsis a map containing any custom functionality that is required in the script (see later in thedocommand)valueSetCallbackis a callback that is called whenever a value is written in to the record (which is useful in case you’d like to save the record to a backend server, for example).
See a more detailed example here.
Script Syntax
We write scripts in a yaml file and compile it to a json file that the runner is able to read.
(To compile we can use the `hatool-compiler’ tool).
Basic structure
Each script file contains one or more scripts:
- name: Main script
  description: script for random users browsing the website
  ...

- name: Support script
  description: script for users requesting support
Each script in a script file contains one or more snippets. The entry-point to the script is also named the default snippet. The default snippet must be named default.
Snippets
Each snippet has a name and a list of steps to execute - each step runs a single command.
A full ‘Hello, World’ example:
- name: Hello World
  description: A simple "Hello World" script
  snippets:
    - name: default
      steps:
        - say: Hello, World!
Script Commands
say
This command will add a ‘bot’ message to the chat.
The basic structure of this command is by using a simple string:
- say: Hi there!
You can also use simple templating to fill in values from the record:
- say: Hi there, !
The templating engine supports dot notation for accessing inner objects:
- say: Hi there, !
In case you need to support multiple languages, say also accepts the same string in multiple locales:
- say:
    es: Hola, amigo!
    _: Hi there, friend!
The script runner will choose the correct string based on the provided locale, or _ as the fallback.
wait
wait is a general purpose command for receiving input from the user.
It has a four modes: single text line, long text, single-select options and multiple-select options.
Single Text Line
This is the basic functionality of this command, used for receiving a user’s response as a single line of text.
This command has the following mandatory parameter:
variable- field inrecordin which the response will be stored
And the following optional parameters:
required- Should we require a value in this field or allow empty responses? (true by default)placeholder- text to show in the input box when it’s empty (i.e. before the user started typing)input-kind- used for native field validation and customization. Some possible values aretext,number,date- see here for more examples. By default all inputs aretext.input-min- used to specify a minimum value for the field, when relevand by the input typeinput-max- used to specify a maximum value for the field, when relevand by the input typeinput-step- used to specify a numerical step value for the field, when relevand by the input typesuggestionsFrom- TBDvalidation- a regular expression which the value needs to match before it’s considered valid and accepted.
- say: What is your age?
- wait:
    placeholder: Your age...
    input-kind: number
    input-min: 1
    input-max: 120
    input-step: 1
    variable: age
Long Text
‘Long Text’ mode is very similar to ‘Single Text Line’ mode. The only difference being that a multiple-line input box is used instead of a single line one. The user interaction also differs so that pressing ‘Enter’ on the keyboard doesn’t automatically submit the user’s response, but rather adds a new line to the current response.
To enable ‘Long Text’ mode simply add long: yes to the wait command:
- wait:
    variable: thoughts
    long: yes
Single-select options
This variant of wait is for when there’s a small finite set of possible responses for the user to choose from. These options are displayed as a few buttons, which when clicked correspond to the user selecting a specific option.
In this variant the command receives an options parameter which lists the different possible options.
Each item in option is an object with the following andatory field:
show- what to display as the button’s label. Has the same behavious as insay(i.e. supports templating and i18n)
And these possible fields:
value- value to assign to this option (in case it’s missing, theshowvalue will be used)steps- list of steps to be run when this option is selected.unless- specifies a field name to check inrecord. It will attach the CSSunlessclass to this option if the value for that field inrecordis not truthy.class- CSS class to be assigned to the button (for theming purposes). String value, empty by default.echo- Prevents the button from being shown in case it was selected. Boolean value, true by default.func- callable to be executed upon selection. The return value of the callable is then used as the actual selected value. Ifnullis returned, then the selection is ignored altogether. Might be useful, for example, when wanting to integrate a ‘confirm modal’ UI for a specific option’s choice.
The wait command contains an optionsFrom parameter instead of options. In that case, the content of the options is fetched from record[wait.optionsFrom].
- say: Please select a flavour
- wait:
    variable: selected_flavour
    options:
        - show: Dark Chocolate
          value: chocolate
        - show: Vanilla
          value: vanilla
        - show: I don't want Ice Cream
          value: doesnt-want
          class: other
Multiple-select options
This final variant of wait allows selecting multiple boolean possibilities (for a ‘check all options that apply’ kind of scenario).
To enable this mode, set the multi parameter to true while following the same rules for the Single-select options mode. Then, each option can have a field parameter which converts it to a checkbox option.
The return value is an object which contains all the fields from all the checked options set to true.
Always remember to leave one option without a field to serve as the “done selecting” option.
- say: Please choose toppings
- wait:
    variable: selected_toppings
    multi: true
    options:
        - show: Sprinkles
          field: sprinkles
        - show: Chocolate Syrup
          field: chocolate_syrup
        - show: Done selecting
switch
The switch command is used for branching.
It inspects the value of a specific firld of record, provided in the arg parameter, and based on its value matches a single case in a list of cases.
Each case is then evaluated and selected based on one of these four methods:
match- this case will be selected if therecord[arg]is equal to the value of thematchparameterpattern- similar tomatch, except that the value ofpatternis interpreted as a regular expression that is tested againstrecord[arg]default- iftrue, will serve as a fallback case in case no other case was selectedundefined- will only match ifrecord[arg]is undefined
Each case can specify a list of steps to execute if selected in the steps parameter.
- switch:
    arg: selected_color
    cases:
        - match: red
          steps:
            - say: That's a very bold color!
        - pattern: .*blue
          steps:
            - say: Any kind of blue is great!
        - default: true
          steps:
            - say: I don't have any specific opinion on
        - undefined: true
            # Do nothing if not defined!
do
This command is used to incorporate custom functionality within the script.
It receives the mandatory cmd parameter - the name of the function to run - and a few optional parameters:
variable- is the name of the field inrecordin which the return value of the function is to be stored.-
params- are a list of parameters that are passed to the function.A parameter can be any string and it will be processed using the templating and i18n engines prior to being passed to the function. A special value for parameters is
record, allowing functions to receive the runner’srecord, read from it and manipulate it if necessary.
All functions must be defined in the customFunctions parameter for run(). Passed functions can be sync or async functions.
For example, you might define a function like so:
runner.run(
    ...,
    {
        updateCreationDate: (record) => {
            if (record.creation_date) {
                return record.creation_date;
            }
            return (new Date()).toLocaleDateString();
        }
    }
)
And in the script you would call it like so:
- do:
    cmd: updateCreationDate
    variable: creation_date
    params:
      - record
goto
goto is used to jump to another snippet in the current script.
Unlike the C-style goto’s, when the called snippet is finished, the current (calling) snippet will continue execution from the next command after goto.
One exception for that is calling - goto: complete. The reserved snippet name complete can be used to stop the script from running altogether, similarly to using return in the middle of a function.
See pop for a more fine-grained method for exiting a snippet.
pop
pop can be used to return from a specific snippet. Execution will pop the call stack until it reaches a specific snippet.
For example, pop: default will return from all running snippets until control returns to the default snippet.